
A DIY seating bench is a perfect project for any home. It’s practical and stylish.
Building your own bench can save money and give your space a personal touch. Imagine having a cozy bench in your garden or a functional piece in your hallway. DIY seating benches are not only cost-effective but also allow you to customize the design to fit your style and space.
Whether you are a beginner or an experienced woodworker, creating a bench can be a rewarding experience. With a few tools and materials, you can craft a piece that reflects your personality and needs. In this blog post, we will guide you through the process, offering tips and ideas to help you build the perfect seating bench for your home.
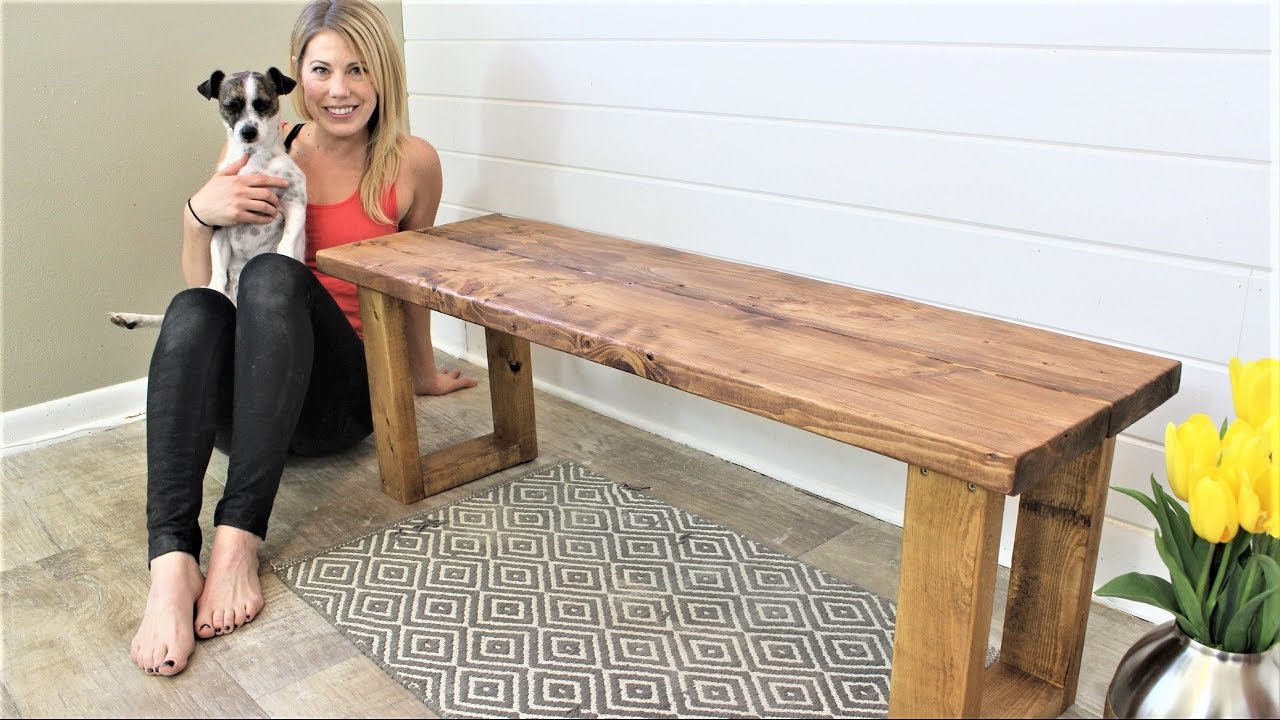
Credit: www.youtube.com
Introduction To DIY Seating Bench
A DIY seating bench can be a fun project. You can save money and get a unique piece of furniture. DIY benches can be made to fit your space perfectly. You can choose the materials and design.
Building your own bench has many benefits. You can customize it as you like. It’s a great learning experience. You can take pride in your work. It can also be a fun activity for families. Plus, you can control the quality of materials used
Materials And Tools Needed
Gather wood, screws, and sandpaper for your DIY seating bench. Basic tools like a saw, drill, and measuring tape are essential.
Essential Materials List
Wood planks for the bench seat and legs. Screws and nails to hold everything together. Sandpaper for smoothing rough edges. Paint or stain to finish the bench. Wood glue for extra strength. A measuring tape to ensure accurate cuts. A pencil for marking measurements. Clamps to hold pieces in place while gluing.
Recommended Tools
A saw to cut the wood planks. A drill to make holes for screws. A screwdriver to secure screws. A hammer to drive nails. A sander to smooth the wood. A paintbrush for applying paint or stain. Safety goggles to protect your eyes. A workbench to have a sturdy surface for building.
Design And Planning
Start with a simple design. A bench with a backrest is comfortable. Think about the style of your room. Match the bench to your decor. Rustic, modern, or classic styles work well. Consider storage options too. Draw a sketch of your idea. This helps visualize the bench.
Measure the area for your bench. Use a tape measure. Write down the length, width, and height. Leave some space around it. This allows easy movement. A bench too big feels cramped. Too small, and it looks odd. Accurate measurements ensure a good fit. Double-check your numbers. Mistakes can cause problems later.

Credit: scrappygeek.com
Cutting And Preparing Materials
First, gather your wood pieces. Use a measuring tape to measure. Mark the wood with a pencil. Cut each piece carefully. Use a saw for straight cuts. Be sure to wear safety goggles. Keep your fingers away from the saw blade. Check the size of each piece. Make sure all pieces match your plan.
Sand each piece of wood. Start with rough sandpaper. Smooth the edges first. Then, use finer sandpaper. Make the surface smooth. Feel for any rough spots. Sand those areas again. Be patient. Smooth wood looks nice. It’s also safer. Avoid splinters. Your bench will look better.
Assembling The Bench Frame
First, gather all your tools. You need a hammer, nails, and wood glue. Start by placing the two longer pieces of wood parallel. Then, connect them with the shorter pieces to form a rectangle. Use wood glue to secure the joints. Next, hammer nails into the corners for extra strength. Let the glue dry completely.
Check if the bench frame is stable. Shake it gently. If it wobbles, add more nails to the joints. Ensure all pieces fit snugly. This will prevent any movement. A stable bench is safe and lasts longer.

Adding The Seat And Backrest
First, measure the bench frame. Cut a wooden board to fit. Place the board on the frame. Make sure it sits evenly. Use screws to secure the board. Tighten each screw firmly. This keeps the seat stable. Check for any loose parts. Adjust if needed. Your seat is now attached.
Choose a sturdy piece of wood. Cut it to match the frame width. Position the wood vertically. Align it with the back of the seat. Drill holes for screws. Insert screws through the holes. Tighten them to secure the backrest. Ensure the backrest is straight. Adjust if needed. Your backrest is now installed.
Finishing Touches
Choose a color or stain for your bench. Use a brush or roller to apply the paint. Apply evenly. For stains, use a clean cloth. Wipe off excess stain. Let it dry. Apply a second coat if needed. Use a sealer to protect the wood. This step helps the bench last longer.
Pick cushions that match your style. Add pillows for more comfort. Place a throw blanket over the back. You can also add a small table next to the bench. This is useful for holding drinks or books. Add a plant for a fresh look. Accessories make the bench cozy and inviting.
Maintenance And Care Tips
Keep your bench clean. Dust it off with a soft cloth. Use a mild soap for deeper cleaning. Rinse with water. Let it dry completely. This will help the bench last longer.
Fix small scratches with sandpaper. Use wood filler for deeper cuts. Let the filler dry. Sand the area smooth. Apply a new coat of paint or varnish. Keep an eye on loose screws. Tighten them when needed
Showcasing Your Finished Bench
Place the bench near a window for lots of light. Add colorful cushions to make it cozy. A small side table can hold books or a lamp. Near the entryway, it can be used for sitting while putting on shoes. This adds a welcoming feel.
Put the bench in the garden for a peaceful spot. Near flowers or a small pond makes it relaxing. On the porch, it can be used for morning coffee. Backyard placement is great for barbecues or gatherings. Add some shade like an umbrella for comfort.
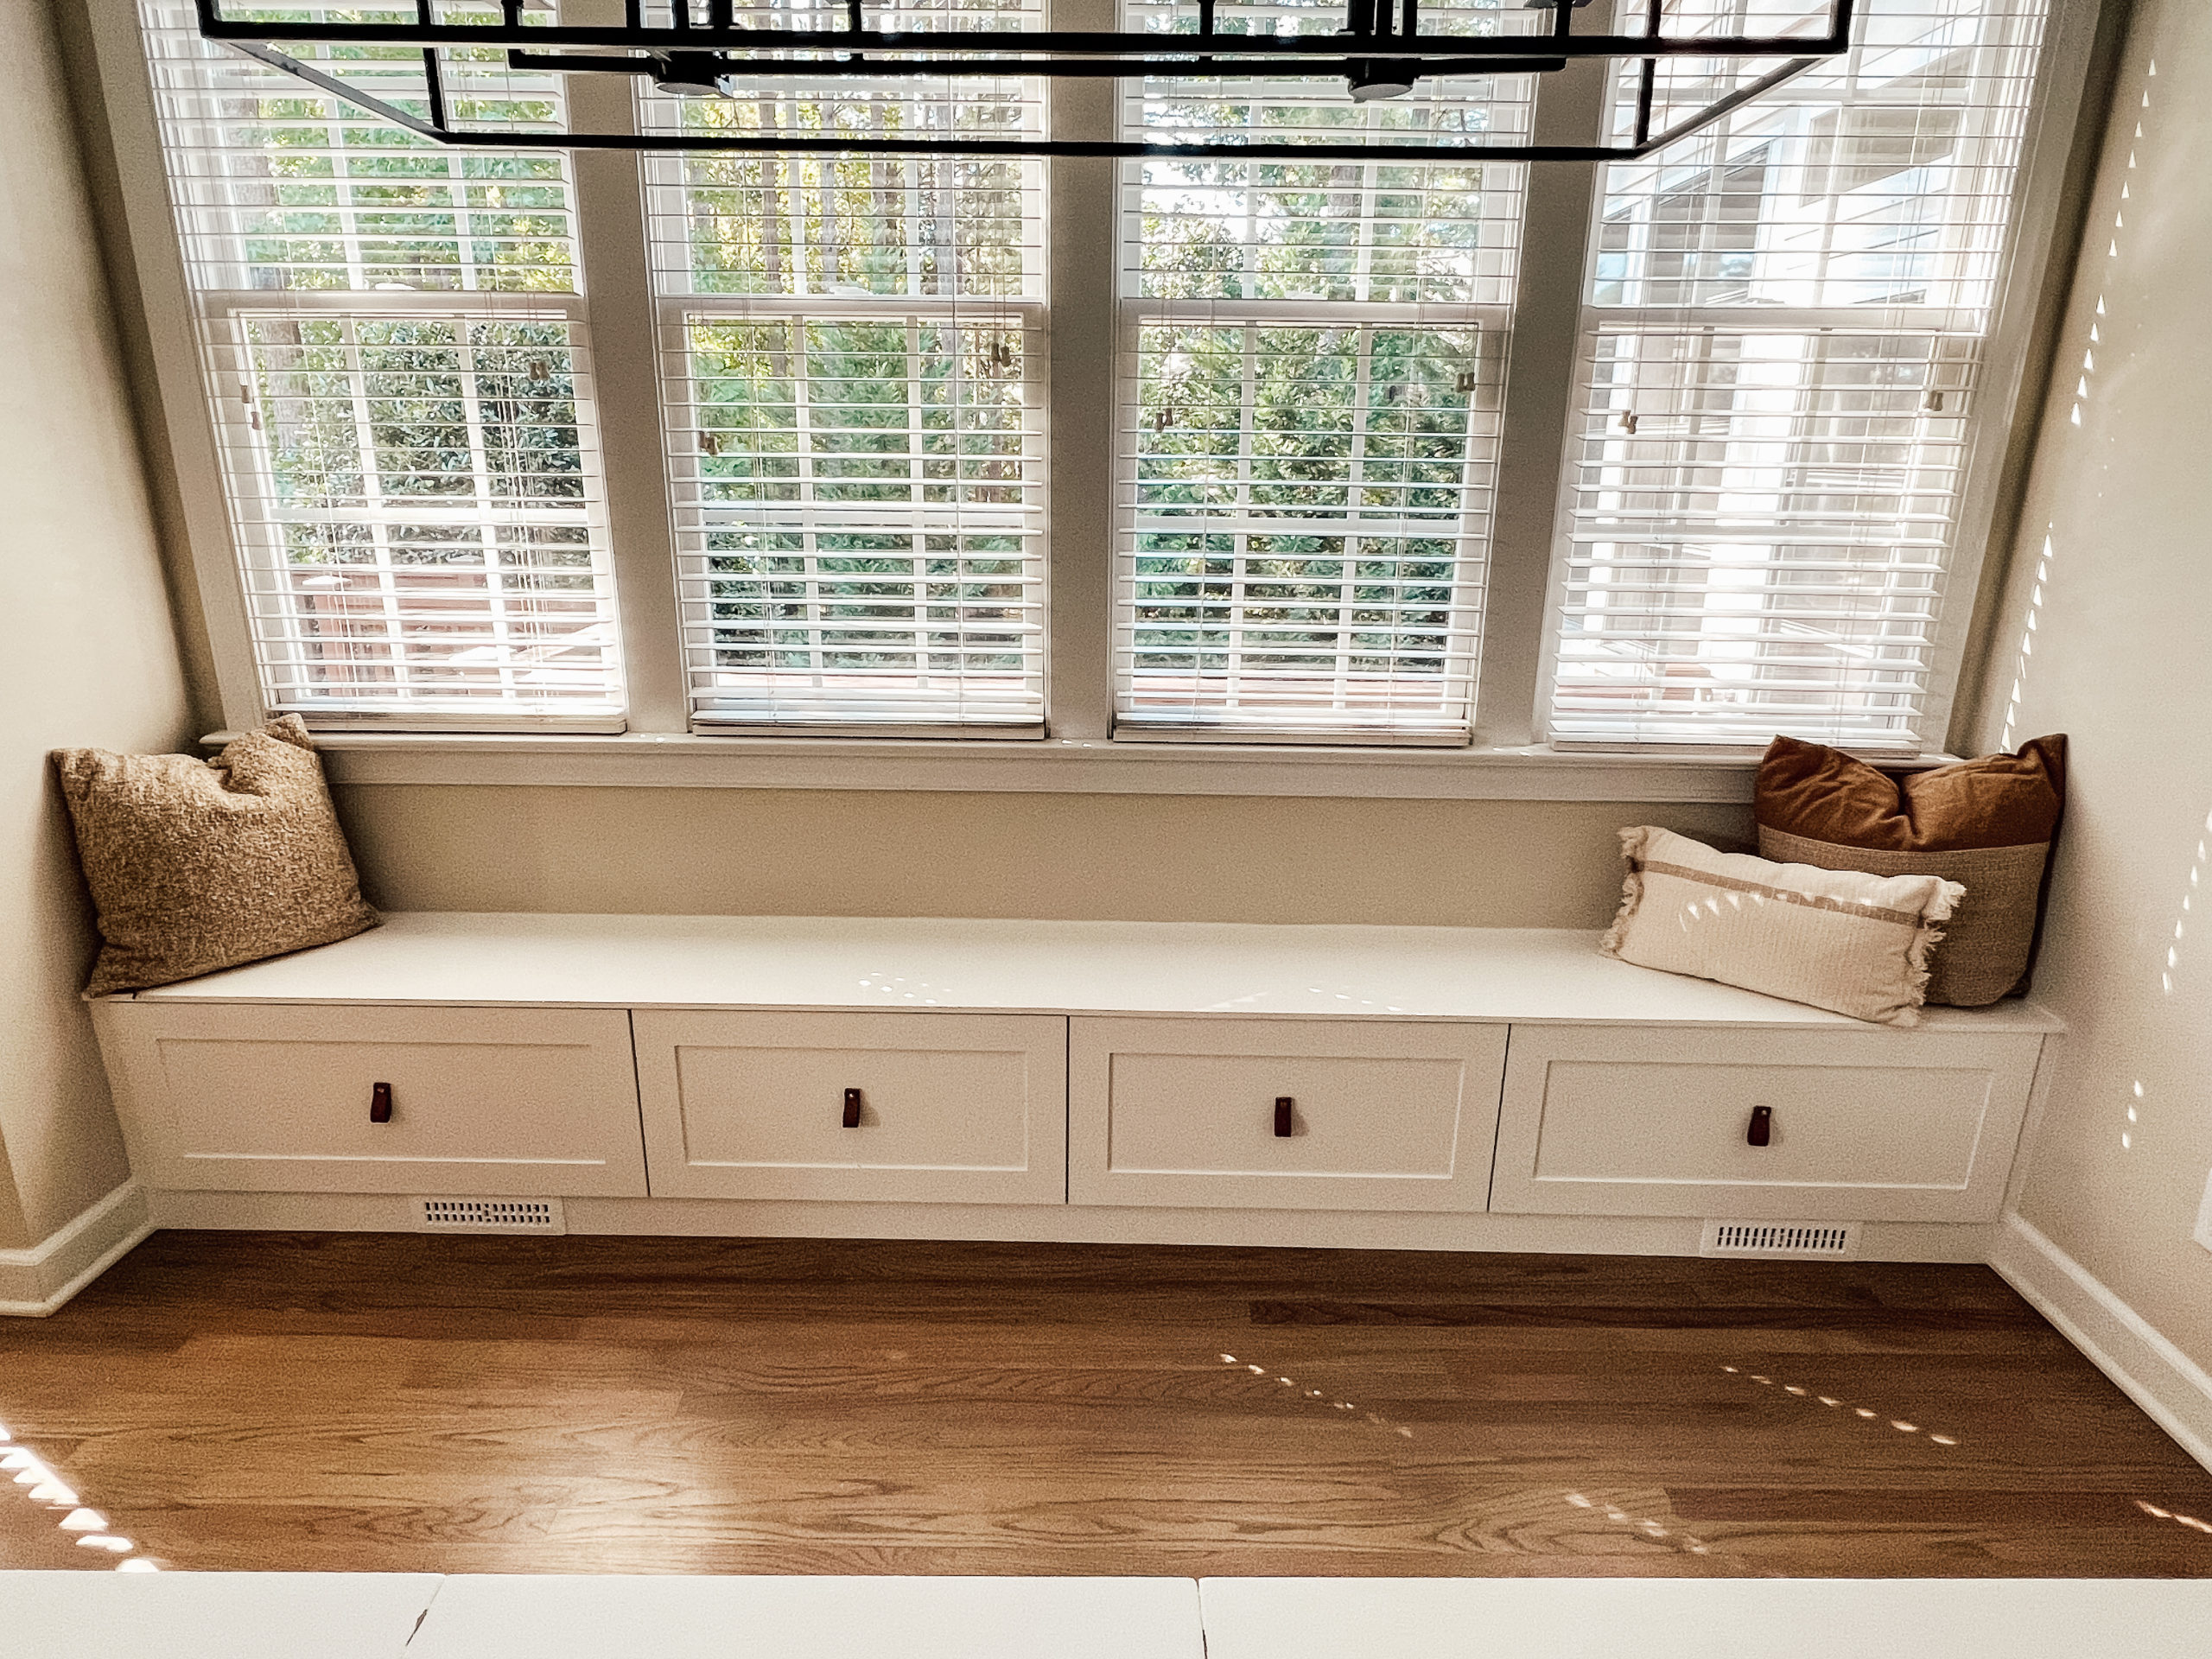
Credit: homeandkind.com
Frequently Asked Questions
How Much Does It Cost To Build Bench Seating?
The cost to build bench seating varies. Expect to spend between $200 and $800, depending on materials and size.
What Is The Best Fabric For Diy Bench Cushion?
The best fabric for DIY bench cushions is durable, water-resistant, and easy to clean. Consider using outdoor fabrics like Sunbrella.
How To Make Outdoor Bench Seating?
To make outdoor bench seating, gather materials like wood, screws, and a saw. Measure and cut the wood. Assemble the frame and seat. Sand and paint or stain the bench. Secure the bench in your desired location. Enjoy your new outdoor seating!
What Angle Should A Bench Seat Back Be?
The ideal bench seat back angle is 100 to 110 degrees. This provides optimal comfort and support.
Conclusion
Building your own seating bench is a rewarding project. It offers a personal touch to your space. You can customize the design and materials. This ensures it fits your style perfectly. Plus, it’s budget-friendly and fun. Gather your tools and get started today.
Enjoy the satisfaction of creating something with your hands. Happy building!
Recent Posts
Many people wonder if they can safely burn firewood that might have termites. It's a common question because nobody wants to damage their home or start a fire that's not safe. The good news is,...
It’s pretty common for folks to wonder, Can You Hear Termites Eating Wood? Warning Signs can sometimes be sneaky, and for those new to spotting them, it might feel a little tricky. You might be...